ZhangYc 的博客

记录漫漫开发之旅


  • 首页

  • 关于

  • 标签

  • 分类

  • 归档

使用Hexo&NexT搭建个人博客

发表于 2019-08-09 更新于 2019-08-15 分类于 Hexo 阅读次数:
本文字数: 6.3k 阅读时长 ≈ 6 分钟

前言

在写这篇博客的之前,我是没有自己的博客的,以前都想着自己搞个博客,写写文章呀啥的记录一下这漫漫的开发之旅。
现在好了,在一次查资料的经历中我得知了一个可以免费创建个人博客的方案:及Hexo+Git 即可实现,
话不多说了,直接出教程!


准备工作

  1. 有一个github账号,没有的话去注册一个;
  2. 安装了node.js、npm,并了解相关基础知识;
  3. 安装了git客户端.
  • npm、node.js安装教程
    • windows:https://www.cnblogs.com/shawnchou/p/11028713.html
    • mac: https://blog.csdn.net/u012982629/article/details/80526385
    • linux: https://www.cnblogs.com/zouke1220/p/9723191.html
  • git安装教程:https://git-scm.com/downloads

搭建github博客

创建仓库

新建一个名为你的用户名.github.io的仓库,比如说,如果你的github用户名是test,那么你就新建test.github.io的仓库(必须是你的用户名,其它名称无效),将来你的网站访问地址就是 http://test.github.io 了,是不是很方便?

配置SSH Key

为什么要配置这个呢?因为你提交代码肯定要拥有你的github权限才可以,但是直接使用用户名和密码太不安全了,所以我们使用ssh key来解决本地和服务器的连接问题。

1
$ cd ~/. ssh #检查本机已存在的ssh密钥

如果提示:No such file or directory 别慌,这说明你是第一次使用git,让我们创建一下SSH key

1
ssh-keygen -t rsa -C "邮件地址"   #邮件地址是你登录github的邮件地址

然后连敲三次回车出现下面的信息,及表示SSH key创建成功了!

1
2
3
4
5
6
7
8
9
10
11
12
13
14
15
16
17
18
19
20
21
22
zycdeAir:~ zyc$ ssh-keygen -t rsa -C "1511334061@qq.com"
Generating public/private rsa key pair.
Enter file in which to save the key (/Users/zyc/.ssh/id_rsa):
Created directory '/Users/zyc/.ssh'.
Enter passphrase (empty for no passphrase):
Enter same passphrase again:
Your identification has been saved in /Users/zyc/.ssh/id_rsa.
Your public key has been saved in /Users/zyc/.ssh/id_rsa.pub.
The key fingerprint is:
SHA256:CwR1Q5MNndsmzmi/MtcpKNl5N/bf+6OK+OtC/ASGyo4 1511334061@qq.com
The key's randomart image is:
+---[RSA 2048]----+
| ....*= . |
| . ..o+ |
| o o |
| o o o o |
| . . + S+ o |
| o +ooo |
| o .+++ . . |
| E . o.B.* * ..|
| o+Xo*.+ooB|
+----[SHA256]-----+

最终会生成一个文件在用户目录下,打开用户目录,找到.ssh\id_rsa.pub文件,记事本打开并复制里面的内容,打开你的github主页,进入个人设置 -> SSH and GPG keys -> New SSH key:
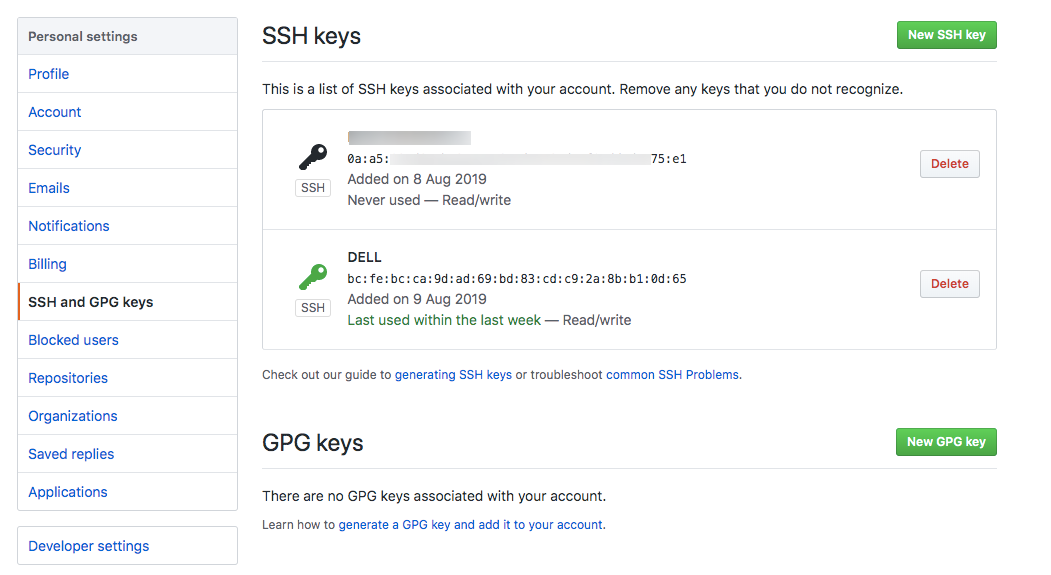
配置SSH key示例

检测一下配置是否成功:

1
$ ssh -T git@github.com # 注意邮箱地址不用改

如果提示Are you sure you want to continue connecting (yes/no)?输入yes,然后会看到:

1
2
3
Warning: Permanently added 'github.com,52.74.223.119' (RSA) to the list of known hosts.
Enter passphrase for key '/Users/zyc/.ssh/id_rsa':
Hi zyclovehyp! You've successfully authenticated, but GitHub does not provide shell access.

看到这个信息说明SSH已配置成功!此时你还需要配置:

1
2
zycdeAir:~ zyc$ git config --global user.name "zyc"
zycdeAir:~ zyc$ git config --global user.email "1511334061@qq.com"

使用hexo写博客

安装Hexo

1
$ npm install -g hexo

初始化

在电脑的某个地方新建一个名为hexo的文件夹(名字可以随便取),比如我的是F:\Workspaces\hexo,由于这个文件夹将来就作为你存放代码的地方,所以最好不要随便放。

hexo init

1
2
3
4
5
6
7
8
9
10
11
12
13
14
15
16
17
18
19
20
21
22
23
24
25
26
27
28
29
30
31
32
33
34
35
zycdeAir:zyc.dev zyc$ mkdir blog
zycdeAir:zyc.dev zyc$ ls
blog maven_repository
coding software
zycdeAir:zyc.dev zyc$ cd blog/
zycdeAir:blog zyc$ hexo init
INFO Cloning hexo-starter https://github.com/hexojs/hexo-starter.git
Cloning into '/Users/zyc/zyc.dev/blog'...
remote: Enumerating objects: 4, done.
remote: Counting objects: 100% (4/4), done.
remote: Compressing objects: 100% (4/4), done.
remote: Total 81 (delta 0), reused 1 (delta 0), pack-reused 77
Unpacking objects: 100% (81/81), done.
Submodule 'themes/landscape' (https://github.com/hexojs/hexo-theme-landscape.git) registered for path 'themes/landscape'
Cloning into '/Users/zyc/zyc.dev/blog/themes/landscape'...
remote: Enumerating objects: 31, done.
remote: Counting objects: 100% (31/31), done.
remote: Compressing objects: 100% (25/25), done.
remote: Total 1009 (delta 10), reused 17 (delta 5), pack-reused 978
Receiving objects: 100% (1009/1009), 3.22 MiB | 3.00 KiB/s, done.
Resolving deltas: 100% (543/543), done.
Submodule path 'themes/landscape': checked out '73a23c51f8487cfcd7c6deec96ccc7543960d350'
INFO Install dependencies
npm WARN deprecated core-js@1.2.7: core-js@<2.6.8 is no longer maintained. Please, upgrade to core-js@3 or at least to actual version of core-js@2.

> fsevents@1.2.9 install /Users/zyc/zyc.dev/blog/node_modules/fsevents
> node install

node-pre-gyp WARN Using needle for node-pre-gyp https download
[fsevents] Success: "/Users/zyc/zyc.dev/blog/node_modules/fsevents/lib/binding/Release/node-v64-darwin-x64/fse.node" is installed via remote
npm notice created a lockfile as package-lock.json. You should commit this file.
added 411 packages from 523 contributors and audited 6879 packages in 25.789s
found 1 low severity vulnerability
run `npm audit fix` to fix them, or `npm audit` for details
INFO Start blogging with Hexo!

启动Hexo

hexo s #开启本地预览服务

1
2
3
4
zycdeAir:blog zyc$ hexo s
INFO Start processing
INFO Hexo is running at http://localhost:4000 . Press Ctrl+C to stop.
^CINFO Catch you later

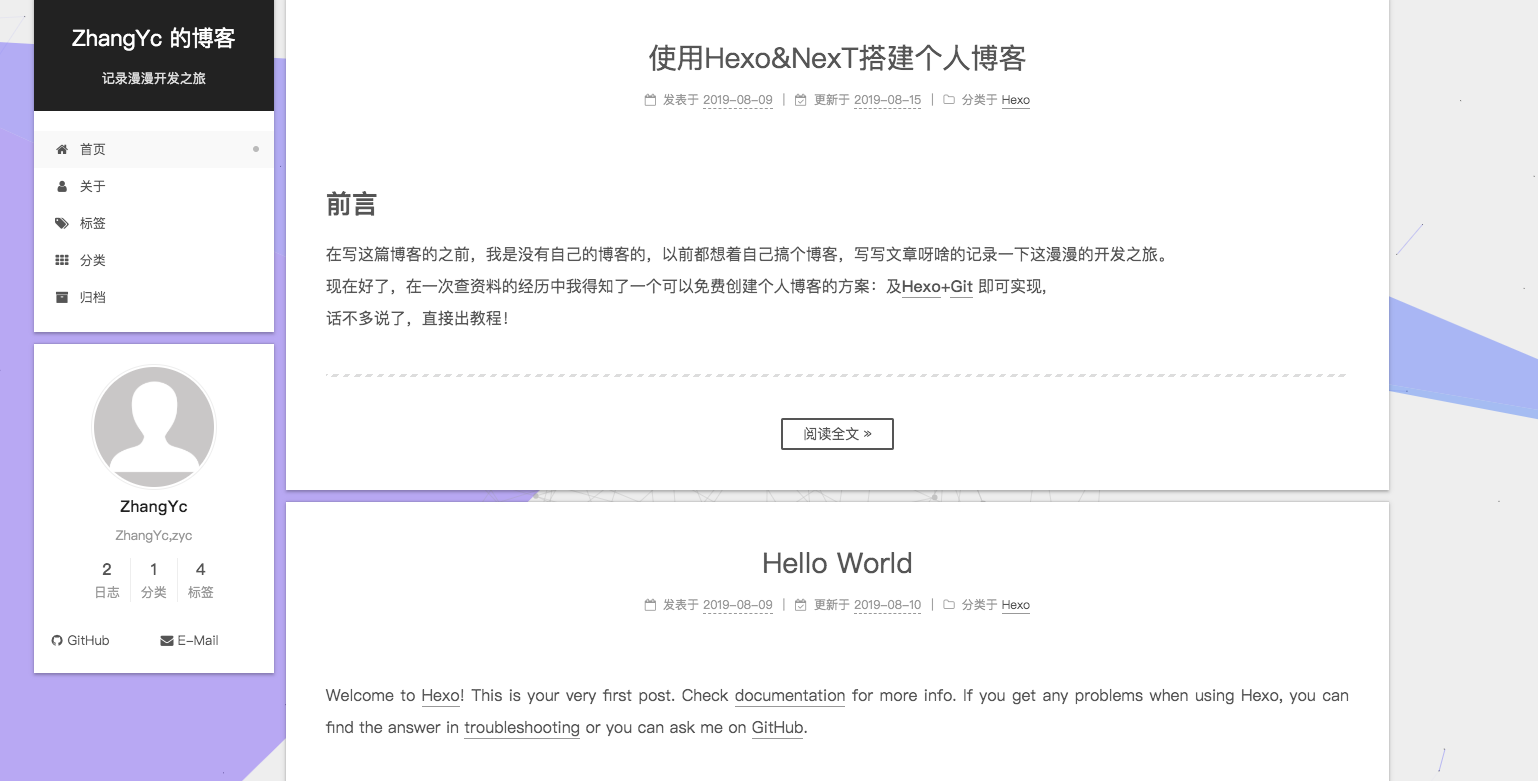
第一次初始化的时候hexo已经帮我们写了一篇名为 Hello World 的文章,默认的主题比较丑,打开时就是这个样子:
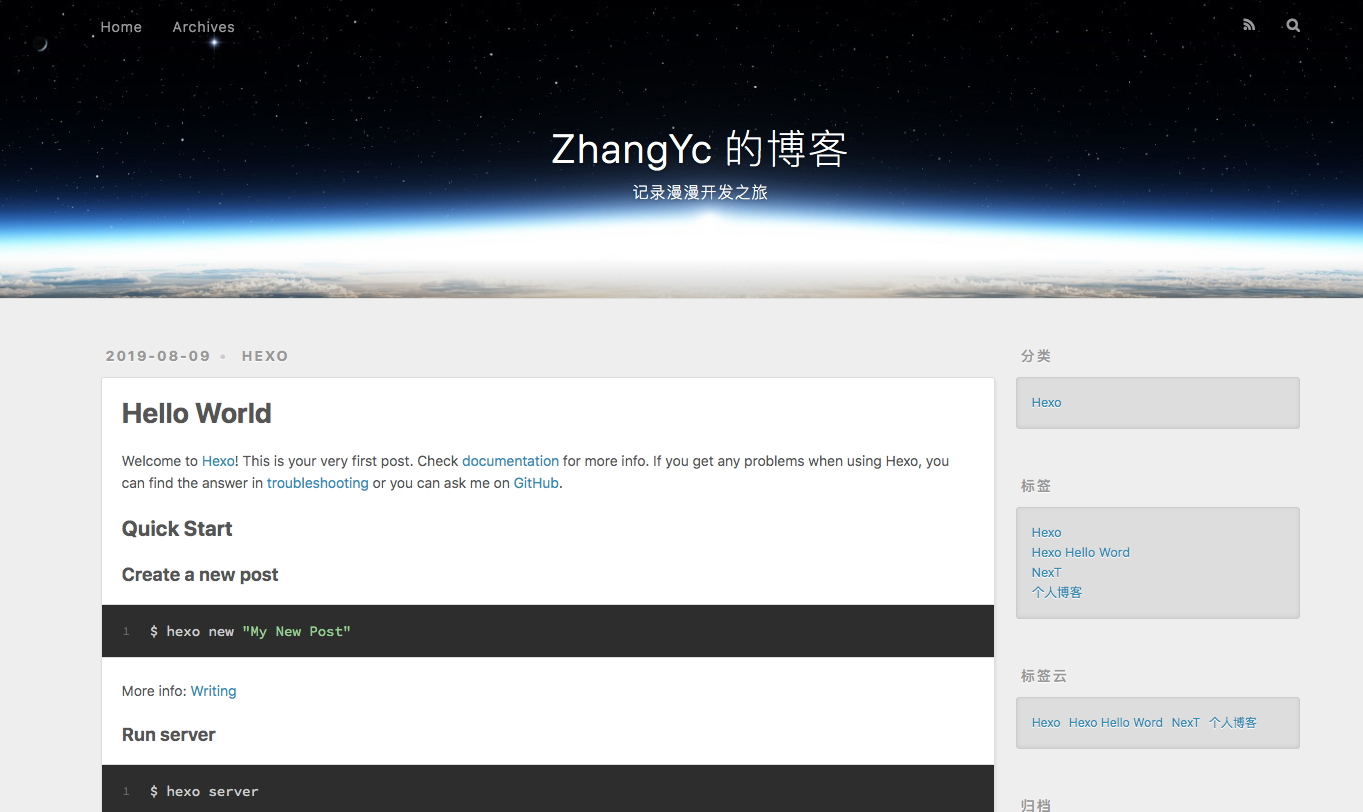
配置SSH key示例

配置主题

既然默认主题很丑,那我们别的不做,首先来替换一个好看点的主题。这是 官方主题。
个人比较喜欢的这个主题:hexo-theme-next
首先下载这个主题:

1
2
3
4
5
6
7
8
9
10
11
12
13
14
zycdeAir:blog zyc$ cd themes/
zycdeAir:themes zyc$ ls
hexo-theme-next landscape
zycdeAir:themes zyc$ git clone git@github.com:theme-next/hexo-theme-next.git
fatal: destination path 'hexo-theme-next' already exists and is not an empty directory.
zycdeAir:themes zyc$ git clone git@github.com:theme-next/hexo-theme-next.git next
Cloning into 'next'...
Enter passphrase for key '/Users/zyc/.ssh/id_rsa':
remote: Enumerating objects: 76, done.
remote: Counting objects: 100% (76/76), done.
remote: Compressing objects: 100% (74/74), done.
remote: Total 8705 (delta 31), reused 8 (delta 2), pack-reused 8629
Receiving objects: 100% (8705/8705), 5.95 MiB | 55.00 KiB/s, done.
Resolving deltas: 100% (5547/5547), done.

下载后的主题都在这里:

blog_path/themes/

修改_config.yml中的theme: landscape改为theme: yilia,然后重新执行hexo g来重新生成。
如果出现一些莫名其妙的问题,可以先执行hexo clean来清理一下public的内容,然后再来重新生成和发布。

发布到Git

注意:在上传代码到github之前,一定要记得先把你以前所有代码下载下来(虽然github有版本管理,但备份一下总是好的),因为从hexo提交代码时会把你以前的所有代码都删掉。

如果你一切都配置好了,发布上传很容易,一句hexo d就搞定,当然关键还是你要把所有东西配置好。
首先,ssh key肯定要配置好。
其次,配置_config.yml中有关deploy的部分:
deploy:
  type: git
  repository: git@github.com:zyclovehyp/zyclovehyp.github.io.git
  branch: master

Hexo 常用命令

1
2
3
4
5
6
7
hexo new "postName" #新建文章
hexo new page "pageName" #新建页面
hexo generate #生成静态页面至public目录
hexo server #开启预览访问端口(默认端口4000,'ctrl + c'关闭server)
hexo deploy #部署到GitHub
hexo help # 查看帮助
hexo version #查看Hexo的版本

写博客

定位到我们的hexo根目录,执行命令:

1
hexo new 'my-first-blog'

hexo会帮我们在_posts下生成相关md文件,当然你也可以直接自己新建md文件,用这个命令的好处是帮我们自动生成了时间。
一般完整格式如下:

1
2
3
4
5
6
7
8
---
title: postName #文章页面上的显示名称,一般是中文
date: 2013-12-02 15:30:16 #文章生成时间,一般不改,当然也可以任意修改
categories: 默认分类 #分类
tags: [tag1,tag2,tag3] #文章标签,可空,多标签请用格式,注意:后面有个空格
description: 附加一段文章摘要,字数最好在140字以内,会出现在meta的description里面
---
以下是正文

那么hexo new page ‘postName’命令和hexo new ‘postName’有什么区别呢?

hexo new page ‘postName’
最终部署时生成:hexo\public\my-second-blog\index.html,但是它不会作为文章出现在博文目录。

如何让博文列表不显示全部内容

默认情况下,生成的博文目录会显示全部的文章内容,如何设置文章摘要的长度呢?

答案是在合适的位置加上即可,例如:

# 前言

使用github pages服务搭建博客的好处有:

1. 全是静态文件,访问速度快;
2. 免费方便,不用花一分钱就可以搭建一个自由的个人博客,不需要服务器不需要后台;
3. 可以随意绑定自己的域名,不仔细看的话根本看不出来你的网站是基于github的;

<!--more-->

4. 数据绝对安全,基于github的版本管理,想恢复到哪个历史版本都行;
5. 博客内容可以轻松打包、转移、发布到其它平台;
6. 等等;

最终效果

Blog示例

ZhangYc 微信支付

微信支付

ZhangYc 支付宝

支付宝

Hexo 个人博客 NexT

本文标题:使用Hexo&NexT搭建个人博客

文章作者:ZhangYc

发布时间:2019年08月09日 - 15:52

最后更新:2019年08月15日 - 08:58

原始链接:http://zyclovehyp.github.io/2019/08/09/使用Hexo&NexT搭建个人博客/

许可协议: 署名-非商业性使用-禁止演绎 4.0 国际 转载请保留原文链接及作者。

Hello World
Hexo 实现图片点击预览
  • 文章目录
  • 站点概览
ZhangYc

ZhangYc

ZhangYc,zyc
6 日志
5 分类
9 标签
GitHub E-Mail
  1. 1. 前言
  2. 2. 准备工作
  3. 3. 搭建github博客
    1. 3.1. 创建仓库
    2. 3.2. 配置SSH Key
  4. 4. 使用hexo写博客
    1. 4.1. 安装Hexo
    2. 4.2. 初始化
    3. 4.3. 启动Hexo
    4. 4.4. 配置主题
  5. 5. 发布到Git
  6. 6. Hexo 常用命令
  7. 7. 写博客
    1. 7.1. 如何让博文列表不显示全部内容
  8. 8. 最终效果
© ZhangYc | 8k | 7 分钟
由 Hexo 强力驱动 v3.9.0
|
主题 – NexT.Gemini v7.3.0
|
0%